
Blender 2D Animation in a 3D Environment
Have you ever heard of the software Blender? As for all of the artists out there, I'm pretty sure you know about Blender. As for you who don't, I have some news for you, Blender now supports 2D Animation in a 3D Environment! You should definitely check this amazing feature out.
Animating With Grease Pencil
- Changing their position, orientation or size in time;
- Drawing one frame at a time (traditional animation)
- Animating their points;
- Causing the object to move based on the movement of another object (e.g. its parent, hook, armature, etc.). Useful for cut-out animation for example.
In Blender, Grease Pencil objects can be animated in many ways:
Moving as a whole object
Drawing frame by frame
Deforming them
Inherited Animation
2D Traditional Animation
Keyframes
Traditional animation in Grease Pencil can be achieved with the use of keyframes that hold the strokes information at a particular frame or frame range.
With Auto keyframe activated, every time you create a stroke in Grease Pencil object Draw Mode a new keyframe is added at the current frame on the active channel. With Auto keyframe deactivated, you will have to manually add a new keyframe or your new strokes will be added on the active keyframe.
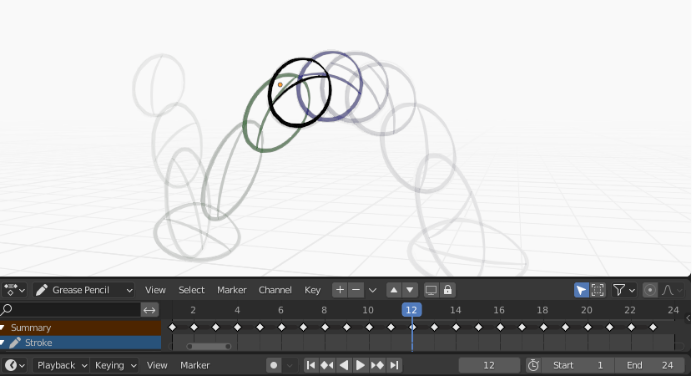
Onion Skinning
One key element in traditional animation is the use of onion skinning. Grease Pencil offers a lot of flexibility and options for this tool.
Onion skinning is a 2D computer graphics term for a technique used in creating animated cartoons and editing movies to see several frames at once. This way, the animator or editor can make decisions on how to create or change an image based on the previous image in the sequence. In traditional cartoon animation, the individual frames of a movie were initially drawn on thin onionskin paper over a light source. The animators would put the previous and next drawings exactly beneath the working drawing, so that they could draw the 'in between' to give a smooth motion. In computer software, this effect is achieved by making frames translucent and projecting them on top of each other. This effect can also be used to create motion blurs, as seen in The Matrix when characters dodge bullets.
Animation Options
-
Draw Mode
- When enabled, new strokes weight data is added according to the current vertex group and weights. If there is no vertex group selected, no weight data is added.
- This is useful for example in cut-out animation for adding new drawing on the same vertex group without the need to creating it afterwards.
- When creating new frames, the strokes from the previous/active frame are include as a basis for the new one.
- If you need to add new strokes to your animation on several frames you can use multiframe drawing.
- You can activate multiframe drawing with the Multiframe button next to the modes selector (faded lines icon)
In Draw Mode there are three related options to the animation workflow that you can use.
Add Weight Data
Additive Drawing
Multiframe
3 Comments
Leave a Comment